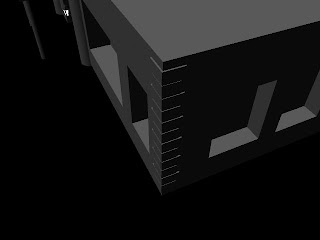
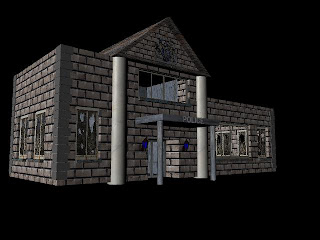
This is only a quick post on my police station which is now textured by our team member James. I am so pleased on how it looks, it is pretty much just how i wanted it. With our main building textured this gives me some real in site on how the rest of the buildings could look.
James put in a nice emblem the coat of arms which shows the building has authority.
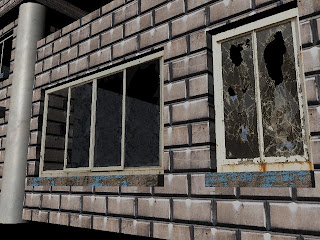
Here is some broken glass which is our main way of showing that our environment is deserted and run down. When trying to create holes and things around being broken, this was messing up the textures which was taking far to long to solve.
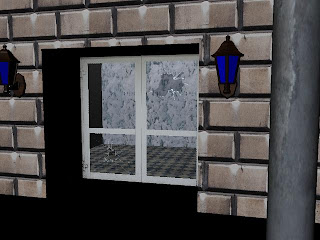
Here is where you can see through the window, James and i put some texturing inside so that you can see the inside of the building.
Tuesday, 23 February 2010
Monday, 22 February 2010
The adventure of a rat, shall lead the way!
As you may already know our group was going to include a character into our environment, so that we had meaning for a camera going round the cave, instead of it randomly moving without any reason. Our character is meant to be of a small rat who is exploring the cave for the first time. We were mainly going to have this in first person with some camera wobbles and sniffing sound effects to give the audience the impression of a rat. We had also decided to have a scene where there would be broken glass on the floor which the rat runs up to and you would be able to see his reflection.
Now, the issue we are having due to such a short amount of time left for this project is actually modeling a rat. Jared said that if we were able to find one online we could use that, but the problem with that is firstly, we would have to pay for it, and secondly it would still need to be rigged. We came up with another idea of green screening a rat, or mouse or even a gerbil as they are all similar. But as i thought more into it the more problems i was finding. Mainly that whenever we would try to green screen it, it probably wouldn't do what we need it to do, or it will just run away and then there would be ciaos.
So, i think our only option left is still do our first person perspective with the wobbling and sniffing but just without the audience being able to see the rat at all. I think this will still be successful as we will have sound effects of a rat dueing the animation and the rat will be looking up at buildings so you will know the character is really small.
Even though this is not really what we wanted, i think this is the next best thing. I think we all got carried away with modeling our environment that we completely forgot about our character until now. And it just shows that trying to get one online is not the way to go!
Wednesday, 17 February 2010
I have been putting on a little extra to my police station with the brick work to the side of the building and window ledges. Also Jared put across something to me that i hadn't really thought about. As you can tell, i have two sets of pillars, the first set being beside the main block of the building. But, the problem was that i did not really have any weight on the pillars, so what is the point of having them? So, i have made the roof of my building wider so that it s sitting nicely on the pillars to give a sense of weight. I have also done this with other set of pillars too, by making the pourch roof thicker.
Monday, 15 February 2010
Colour!!
Ok so this is a section that i forgot to include, even though my group and i have spoken about this on more than one occasion, i have not really written about it on here.
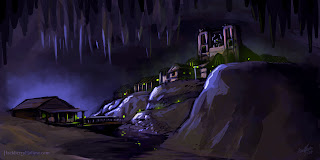
The colour theme we are thinking of using are different shades of Blues and Purples, to give a slightly gloomy and gothic effect. We do not want to portray this as a scary environment as that is not what we are going for but more of a spiritual place. We could go for more natural colours like grays and browns, but we do not want this to be to realistic like a photograph, playing around with colour could give a really nice scene of emotion.
As i am sure most of you know blue is a cold yet calm colour, many of you could relate this to water or when you are feeling sad. We want to portray this as a calm colour so with the uplifting shades of blues and purples this should give us what we need.
I have always thought of purple as a spiritual colour. As i wear dark colours myself people say that gothic colours are black and purple. You would even relate purple to magic.
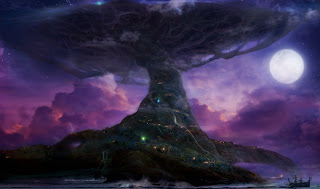
Here are a few images i think are inspiring for our colour grading:
If you look at the clouds of this image, i think to myself this is exactly the type of shading i we could use for our environment. It really draws you into the image, i really think this is beautiful and if we can go on the same type of level as this, we will have ourselves a mystic cave.
Here is a completely different type of shading, which has a lot more blues and blacks but i am drawn in to this image. This wouldn't quite fill our initial intentions but this could show a dark cave, where there has never really been any lighting for people to life in. This is something we could think about if our first hopes don't work out the way we hope.
Friday, 12 February 2010
A little extra detail
After adding the brick detail to the side of the walls, i also remembered that there needs to be window seals, i only made small ones as i do not want them to poke out to much. I am glad Jared said what he did i may have looked into doing more detail and now i am really glad that i have done this. I shall do this with the other buildings to keep up the consistency.
Houses
There is my second building which i modeled, i have started to make more details after Jared said that they were a little simple, which i guess has made me notice more things to do, so, any feedback is good feedback for me to improve my work.
I have kept the house a similar shape to the police station as i want to keep the consistency through out the buildings, this will help to recognise the buildings as a town. Having a load of different type of buildings would not make any sense to what we are trying to achieve.
This is where i changed the window layout and thought this would work better as the windows aren't over crowding the building.
This image was where i was testing out where to place the windows, as you can see i did not really like this layout as i thought the windows were all the same size and shape, plus they take over to much of the building.
I have kept the house a similar shape to the police station as i want to keep the consistency through out the buildings, this will help to recognise the buildings as a town. Having a load of different type of buildings would not make any sense to what we are trying to achieve.
Here you can see i have added this brick effect on the side on the building to make the house more appealing and realistic, many houses have this effect and i thought this would be a step up from the simple building i done previously. This was just a try out and i asked the rest of my group to see if they liked this effect, which they all agreed to. So now i shall do this to the rest of the house to get an overall feel for it.
Here you can just see where i am making my windows, its hard not to put to many in thoughThis is where i changed the window layout and thought this would work better as the windows aren't over crowding the building.
This image was where i was testing out where to place the windows, as you can see i did not really like this layout as i thought the windows were all the same size and shape, plus they take over to much of the building.
Thursday, 11 February 2010
Formative
Yesterday my group and i had our formative. I did not expect to fill in our own forms but when i was going through the sheet, i actually relised that i am not doing quite as well as i had thought. I have a few things to include in which i actually forgot about, like colour, i have not really explained what our group are planning to have, so i shall get onto that straight after this. Our formative has opened my eyes a little to what needs to be focused on. Even though i have now modelled three buildings, they are a little to the simple side. This could look completely different once textured but i have already added some extra things onto my buildings such as window ledges and and brick effects the on side of the buildings. I don't want to include to much as the more i add, the longer its going to take and more will have to be textured.
So the things i need to start thinking about are:
What sort of textures do i want on my buildings?
Modelling my buildings to make them more realistic
Start playing around with UV mapping
Colour
And make sure i reflect on my work.
As a group i really think that most of our buildings and props should be done for next week as i know its going to take some time to texture everything, this may even be a little to much for just James and Ryan to be doing.
I am really interested as what this will look like as an overall piece, we have all created some really nice work.
Thursday, 4 February 2010
ChistleHurst Caves
Ryan, James, Michelle and i had a very interesting adventure today by going to the Chirstlehurst caves. This all came about once we done some research on the Internet and James mentioned that there was a cave in Chistlehurst but was unsure if we were able to actually go inside. After some well done research we had luck, and for a 45 minute tour around the cave it would cost £5 per person.
I must say that the tour was really insightful and i learned a lot of history which has never been my topic but had a lot to offer. This will really help our group to be able to model/texture our cave itself as we having a little difficultly to image how to portray it.
When having a tour round the cave, it was rather damp in places and had a really bad damp smell, which for me was breath taking..... Michelle and i took lanterns whilst the guys were being all grown up if you like, by not taking one. The cave was pitch black all the way through apart from when our tour guide would put his touch on to talk about bits and pieces.
James was our photographer and captured some really detailed images, he also got some textures as well, and you cant really bet anything better than actually being in a cave.
I recorded the whole thing so if you are interested in listening to what he had to say, then please do so, the only thing with this is that you will not understand where he is when talking. My other hand was busy holding the lantern so i was unable to take any photographs. I also got some recordings of us grinding our feet into the ground to create a sense of the rat running around the cave when it comes to the camera shots.
The best thing about the tour was when we all came to a really echo part of the cave and our tour guide went away to make a loud noise so that it would echo around 20 times after. He took our lanterns away and you were in pitch black, you really and truly could not see a thing. With our adrenalin running high, we did not know when he was going to create the noise. And then..............BANG!!!!!!!!!!! There it was the loud noise we were waiting for and wow, it did have a really long echo, and i kept thinking to myself people must have been so frightened as you never knew when a bomb may hit.
Wednesday, 3 February 2010
Modeling!
Well the modeling stage has begun and things are going well, thank god for online tutorials. I do not know if i could have done it without them, at first but i helped Michelle out today and i did not need to refer back to the tutorial. This was a big step for me and i am now confident to model lamps and buildings.
Above are two images from Maya which i modeled. If you look closely they are very similar, the only differences between the two is the first image is a street lamp and the different type of lighting. My first image is most effective and will go within our environment, as we are hoping for a gloomy effect. The second image is not actually a light, i tested out what it would be to mould in the inside of the lamp and hyper shade it white, but as you can see, this is not really recommended but it is always good to test new things.
The Police Station
Here are some shots of my police station that i have recently modeled in Maya. Everything has gone really well, and modeling a building is easiler than what i thought. When modeling i was unsure on how to do the doors and windows , but with a little help from a you tube tutorial link: http://www.youtube.com/watch?v=3GrT40T_dAs, anything is possible. James and Ryan are in change of texturing and i shall be giving one of them the file with in the next few days.
Subscribe to:
Posts (Atom)